Tuesday, September 10, 2013

Garden Update

We are nearing the end of our third summer in the house, and what a change from that first! We have a few pictures of the continued work in our postage stamp yard, which includes a reclaimed brick pad and hand built composter. We (or I) have become avid gardeners since we purchased the house, and have managed to plant a number of food-bearing plants and shrubs, as well as perennials to cool down the hot summer days. We've planted two Elderberry plants, native to southern Ontario, and which in a couple of years should provide us with both flowers for cordial and berries for jams. Currants, herbs, and homeopathic plants such as Bee Balm (also great for our pollinator friends!) and Lemon Balm all have been squashed into place. We are just beginning to see the fruits of our labours (literally). Here are a few shots of the brick work, our composter which in two years has worked out tremendously, and our raised veggie patch.


At long last, an update

There are so MANY things we have done since our last update, it is going to take a while to organize the jobs and the photos, so we will start with the latest.

We are currently working on building a his/her pine and cedar-lined closet in the master bedroom, as storage was the number one deficit of the house when we bought it. At the same time, we are turning the tiny little wall closet that was in the master bedroom into a linen closet, accessible from the hall. This means we had to blow out the wall of the closet facing the hallway, and close up the closet door in the bedroom. This makes for a deep but narrow closet space that will be just wide enough to fit large storage bins on shelves floor to ceiling at the back, with added space closer to the closet door for tall items like brooms or a vacuum. Both closet projects are not yet finished, but here are the project photos:

Bedroom closet frame


Finished closet, cedar lined and painted with milk paint (Sand, Homestead House). Sliding baskets, pants hangers and clothing rails from Ikea. I will get into milk paint later...Doors yet to be designed and built, looking at our options.

Existing closet. Wall facing hallway demo.

From hallway looking in to bedroom closet.


Framing up new closet opening.

View of closet and bedroom from hall.

Framing in old closet opening

Making it nice and tidy.

Interior of linen closet ready to be finished on interior with cedar lining and shelves.

View from bedroom where the closet used to be.

Sunday, August 14, 2011

Results Are In

Here are the final results:


What we did: we tore off the shingled siding after the windows and door were installed. Underneath was a coating of plastic, which had trapped moisture and could have begun to rot the wood. Luckily it hadn't yet, so we covered the exposed plywood with tar paper, then we insulated the exterior with foam to increase our R-factor.


We also used Blue Skin adhesive sealant around the windows and door to increase our heat retention. Next we put up our wood siding. We chose a plywood which is treated on one side with grooves and a rough texture to create a board and baton effect. However, in order to install it, we had to use 4" nails to penetrate through the siding, the foam, and into the plywood and studs. Because of this the going was slow, requiring much muscle power to slam each nail in!

The seams on the horizontal were then covered with 1"x2" to complete the look. The seams on the vertical were invisible to the eye, as the edge of the plywood is grooved to overlap with its neighbouring piece.

We made a bit of a mistake, however, and realized too late to rectify it. We were supposed to put the drip edge, seen here
UNDERNEATH the siding, which meant we should have affixed it before we installed the siding. Drip edge is installed flat side against the wall with the rounded angle pointing to the ground. It prevents rain from collecting on the edges of the wood and then seeping up underneath the siding where it will sit and eventually rot the wood. So once we realized our mistake, we had to hammer the stuff up under the bottom edge of the installed siding and nail it in. This worked well enough, except for a lot of dents and some areas where it is not flush to the bottom of the siding. We learned our lesson for next time.

Lastly, we put up the casing and trim around our windows, the door, and the corners. We used simple 1"x4" for all the trim and a piece of 1"x6" for the sill running along the entire length of the two windows. The windows and door were sealed with caulking where they met the casing, then the entire house was painted with a triple protection exterior paint-and-primer-in-one.

As for the landscaping, we tilled the soil twice with a tiller rented from Home Depot. We then added some black soil to the areas that were formerly concrete, and laid sod over the entire area. We planted some Cedars to make a little privacy shield, a plot in the far end of the yard for a vegetable garden, and a couple of Hostas and Ferns here and there. Next year we will add more plants, shrubs, and flowers. For now we have been enjoying our new backyard, now accessible from our kitchen, every day this summer. Life is sweet!

Tuesday, July 26, 2011

8 months later...

Where to begin? We've been busy through the rest of 2010 and into summer 2011, and to show for it? Let's start at the beginning. The main project we've been working on – the strange little back room off the kitchen that had no real purpose, with only a tiny window and no access to the backyard. The goal was to create a sunny room where we could go in and out to the back yard, have a small loveseat and bookshelves, and maybe a place for breakfast. Here are the before shots:

(looking in from the kitchen.)

(that window was only chest-high.)

(looking out to the kitchen and the rest of the house.)

The second and sister project to the back room project is the backyard project. This required some (literally) backbreaking work. The goal was to remove the concrete pad that occupied over 50% of the back yard, put in some grass for the little one to run around on, and to landscape and plant a small vegetable garden. Here are some before shots:


These shots speak for themselves. The place looked pretty dumpy this time last year.

So what did we do? First, a lot of demo and garbage removal. Over $1000 in bins and junk removal services for both the back room and the back yard. The concrete removal in the back yard was one of those hellish jobs you'll never forget and never do again. All the cards were against us, as we rented a jackhammer that was way too powerful for my spaghetti arms to hold, so the man of the house had to break it all up himself. I was on-hand for moral support and shoulder rubs. Then, the following weekend was a freak April snowstorm in which we had to haul broken slabs of heavy concrete in a wheelbarrow through the narrow path between our house and the neighbours (scraping knuckles against the brick almost every time) and across the street to where we had our bin parked (illegally, we later found out). Here are photos of that cold, wet, and memorable day:

(me loading the concrete.)

(me unloading the concrete.)

At the same time, we hired a contractor to put in a door and two windows. This is one of those times when our skills as DIYers can only go so far, and it is time to call in the pro's. Thank goodness we did, we lucked out on an awesome dude who had his crew in and out of there in under a week. Here is what the place looked like after he was done:

(light! air! access!)


(concrete removed, new windows and door.)

Next up: the yard and back room get a makeover. Photos to come and the process getting there.

Wednesday, October 6, 2010

Finally a room complete! Or is it...?

I just put the finishing touches on the baby's room. It is complete - or as close to complete as we're going to get for the time being. Ideally, we would like to replace the windows and install new trim and mouldings. Currently we have yet to install the quarter round at the baseboards, but we still have to buy a mitre saw. I am currently planning a mural for the main wall in the baby's room, so I have left this empty for the time being.

Before:


What we did:


We took the old fifties hollow door off and replaced it (including hinges and hardware) with the refinished six-panel solid wood door. We filled in some of the chips and holes in the baseboard and trim, gave it a few coats of paint to brighten the light, and picked a fresh bamboo green for the walls. Some light woods and some shelves, and "ta-da!"

It is amazing what some putty, sandpaper, and paint can do. It is the first room in the house that is complete. Well, almost. A mural is in the concept stage right now, and will be posted as work actually commences.

Monday, September 27, 2010

Grapes and Trenches

Fall has arrived abruptly after an intensely hot summer. One day we were sweltering in cotton dresses and shorts, the next I was searching my still-packed boxes for a sweater. With the change of seasons came the need to finally replace our 35 year old furnace. Here is what a 35 year old furnace looks like:


This one was 120,000 btu's, overload for our square footage, and running at roughly 50% efficiency. We looked into geothermal as an alternative to a natural gas furnace, but the cost is much too prohibitive for us at this time. Maybe, like CD players or VHS, both of which started out costing a fortune, geothermal heating will decrease in price as demand rises. Until that time, we opted for a high efficiency furnace at the appropriate btu's for a house the size of ours. We had our new furnace installed for a very good price, but on the condition that we did some manual labour to offset the labour costs. No problem!

This is what we were left with to complete the trench we were asked to dig in order to install the drain line:


It's a big ol' chip hammer. Lets just say with my newly acquired pipes accustomed to hauling a 20 pound child around all day, even I had a hard time holding it up. So the duty fell to D, who managed to dig this in about two hours:


He did an admirable job, not even tearing up the adjoining tiles. So now we have a 2" deep trench in our basement running from the furnace to the drain pipe, which the HVAC installer will be fitting today (he's on his way as I type).

Meanwhile, the furnace is in, and the installer is also putting in a coil so that once we can afford to install AC, it will be a simple enough process. He will also be removing this thing today - a humidifier - that was attached to the old furnace and had probably never been cleaned in the 35 years since it was installed, as can be noted by the wretched stalagmites of pure poison inside:


It looks even grosser in person. The furnace itself is a Goodman, and I admit, as far as furnaces go, its a beaut! I like the retro industrial look:


Happily, we've got a pretty efficient unit at 85,000 btu's at 92.1% efficiency:


This will do nicely for our house and budget, and once we buy a programmable thermostat, we can save even more energy by making sure the house is set to cooler in the nights and daytimes without having to remember ourselves to lower the temperature twice a day.

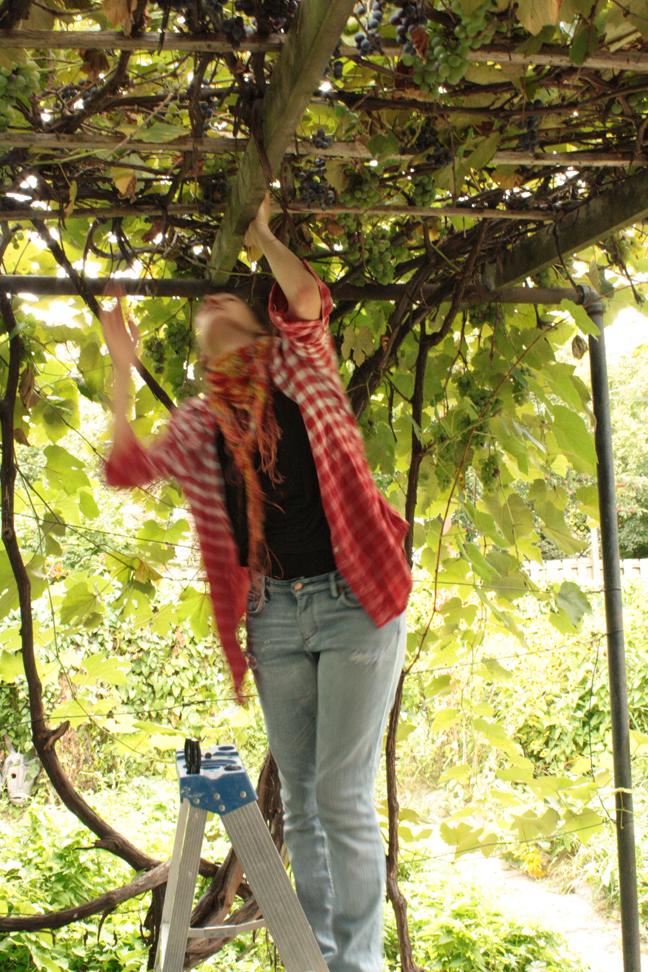
Also with the change of season comes the harvesting of our grapes! This is a whole other endeavour, making wine, for a blog in itself. Lets just say for now that our efforts harvesting the red grapes:


went south in a heartbeat with a teaspoon of sulfites. Now we've got the white grapes on the go, and we're on the second racking. Just like the house, it's a trial and error sort of thing, and we're learning from the mistakes we make. Lets hope our future mistakes on the house, like the grapes, will be in teaspoons and not in gallons.

Friday, August 13, 2010

Bathroom reno apparently includes the kitchen?

We were surprised a couple of days ago with this in our kitchen ceiling and down the cupboards:


Our bathroom on the second floor, right above this section of the kitchen, apparently leaks now when one takes a shower. This is due to the DIY reno job the previous owner did in a hurry and with only the sale of the house in mind, I can only assume, since the drywall wasn't sanded before it was painted, among other clues. The bathroom is on our list of projects to tackle (enlarging it into a four-piece, using some of the square footage from the office beside it), but we were looking at a couple of years from now.


We have yet to have a plumber in to look at the situation, but we can't see any way around pulling up the tiles and or the shower itself to get to the problem. We aren't sure either if the bulkhead in the kitchen, where this leak is coming through, will have to be opened up as well. So, our conundrum: do we pay for a fix and putting things back together, only to rip it apart again in a couple of years? Or do we bite the financial bullet and tackle the bathroom while it is already pulled apart?

As it stands, we have cut off use of the shower and are now using the shower in the basement for the time being. An inspection by a plumber will give us an indication of problem, time, and cost and we will have to make a decision from there. Stay tuned.